
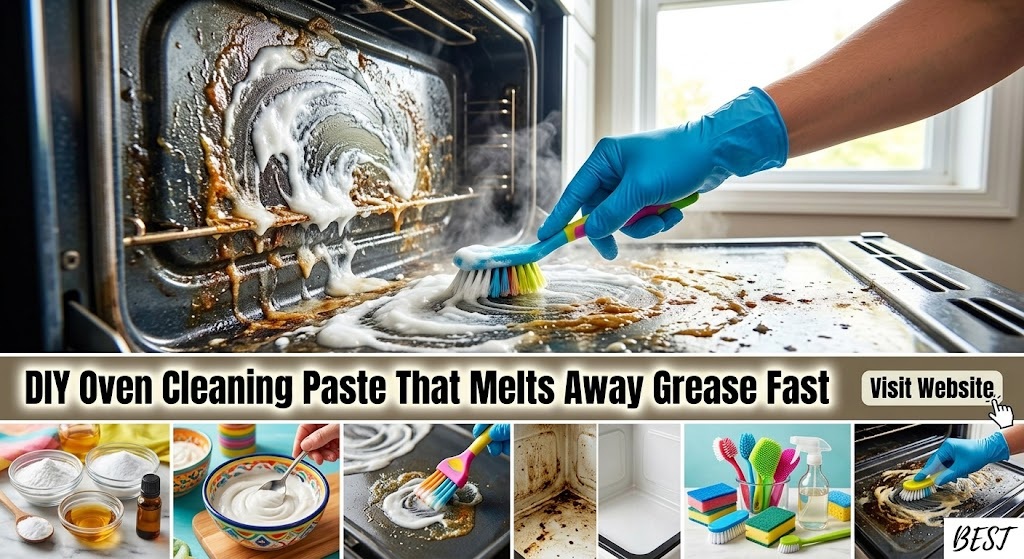
DIY Oven Cleaning Paste Recipes
DIY Oven Cleaning Paste Recipes: The Complete Guide to Natural, Chemical-Free Oven Cleaning
Introduction
Cleaning the oven is one of those household chores that many people dread. The baked-on grease, charred food particles, and stubborn grime that accumulate over months of cooking can seem impossible to remove. Commercial oven cleaners, while effective, often contain harsh chemicals that release toxic fumes, irritate skin and lungs, and come with a hefty price tag.
DIY Oven Cleaning Paste Recipes: 7 Easy Homemade Solutions That Really Work
A dirty oven can produce unpleasant odors, smoke, and baked-on grease that becomes harder to remove over time. Fortunately, you can make effective oven cleaning pastes at home using simple household ingredients. These recipes are easy to prepare, budget-friendly, and free from many of the harsh chemicals found in commercial cleaners.
Important: Never use these recipes on a self-cleaning oven while the self-cleaning feature is active. Always check your oven manufacturer’s cleaning recommendations before using any homemade cleaner.
1. Classic Baking Soda Oven Cleaning Paste
Ingredients
| Ingredient | Quantity |
|---|---|
| Baking soda | 1 cup |
| Water | 3–4 tablespoons |
| White vinegar (for rinsing) | As needed |
Preparation Time
- 5 minutes
Resting Time
- 8–12 hours (overnight)
Cleaning Time
- 20 minutes
Step-by-Step Instructions
Step 1
Place 1 cup of baking soda into a medium mixing bowl.
Step 2
Slowly add water while stirring until a thick, spreadable paste forms.
Step 3
Remove oven racks.
Step 4
Spread the paste over greasy areas, avoiding heating elements.
Step 5
Allow the paste to sit overnight.
Step 6
Wipe away the dried paste using a damp cloth.
Step 7
Spray white vinegar onto any remaining baking soda residue.
Step 8
Wipe clean with fresh water and dry with a microfiber cloth.
Best For
- Burnt grease
- Food spills
- General oven maintenance
2. Lemon Baking Soda Cleaning Paste
Ingredients
| Ingredient | Quantity |
|---|---|
| Baking soda | 1 cup |
| Fresh lemon juice | 3 tablespoons |
| Water | 1 tablespoon |
Preparation Time
- 5 minutes
Resting Time
- 6 hours
Step-by-Step Instructions
Step 1
Combine baking soda and lemon juice in a bowl.
Step 2
Add water until smooth.
Step 3
Spread the paste over dirty oven surfaces.
Step 4
Leave for 6 hours.
Step 5
Scrub gently with a non-scratch sponge.
Step 6
Rinse thoroughly.
Benefits
- Fresh citrus scent
- Helps dissolve grease
- Naturally deodorizes
3. Baking Soda and Dish Soap Paste
Ingredients
| Ingredient | Quantity |
|---|---|
| Baking soda | 1 cup |
| Liquid dish soap | 2 tablespoons |
| Warm water | 2 tablespoons |
Preparation Time
- 5 minutes
Step-by-Step Instructions
- Mix baking soda and dish soap.
- Add warm water.
- Stir until creamy.
- Apply evenly.
- Wait 2–4 hours.
- Scrub gently.
- Wipe with clean water.
Best For
- Heavy grease
- Sticky spills
- Oven doors
4. Hydrogen Peroxide Oven Paste
Ingredients
| Ingredient | Quantity |
|---|---|
| Baking soda | 1 cup |
| Hydrogen peroxide (3%) | 3 tablespoons |
| Dish soap | 1 teaspoon |
Preparation Time
5 minutes
Directions
- Mix baking soda with hydrogen peroxide.
- Add dish soap.
- Stir into a thick paste.
- Apply generously.
- Leave for 3 hours.
- Scrub carefully.
- Wipe clean.
Ideal For
- Burned food
- Tough baked-on stains
5. Vinegar and Baking Soda Deep Cleaning Paste
Ingredients
| Ingredient | Quantity |
|---|---|
| Baking soda | 1 cup |
| Water | 2 tablespoons |
| White vinegar | Spray bottle |
Instructions
- Make a baking soda paste.
- Spread over dirty areas.
- Wait overnight.
- Spray vinegar.
- Allow fizzing to finish.
- Wipe clean.
- Dry thoroughly.
Why It Works
The baking soda loosens grime while vinegar helps lift away residue during the final wipe-down.
6. Salt and Baking Soda Paste
Ingredients
| Ingredient | Quantity |
|---|---|
| Baking soda | ½ cup |
| Table salt | ½ cup |
| Water | 4 tablespoons |
Directions
- Mix dry ingredients.
- Add water gradually.
- Apply to stained areas.
- Leave for 5 hours.
- Scrub gently.
- Wipe clean.
Best For
- Burnt spills
- Grease buildup
7. Essential Oil Fresh-Scent Cleaning Paste
Ingredients
| Ingredient | Quantity |
|---|---|
| Baking soda | 1 cup |
| Water | 3 tablespoons |
| Lemon essential oil | 10 drops |
Instructions
- Mix baking soda and water.
- Add essential oil.
- Stir thoroughly.
- Spread inside the oven.
- Leave overnight.
- Wipe away residue.
- Finish with a damp cloth.
Benefits
- Fresh aroma
- Gentle cleaning
- Helps reduce lingering odors
Helpful Oven Cleaning Tips
- Wear rubber gloves to protect your hands.
- Remove loose crumbs before applying any paste.
- Avoid getting cleaning paste on heating elements or gas ports.
- Use a soft sponge or nylon scrubber instead of steel wool.
- Clean your oven every 2–3 months to prevent heavy buildup.
- Rinse thoroughly to remove any remaining residue before using the oven again.
- Allow the oven to dry completely before turning it on.
Frequently Asked Questions
Can I leave baking soda paste overnight?
Yes. Leaving it on for 8–12 hours helps soften stubborn grease and baked-on food.
Is vinegar safe for oven cleaning?
Yes, when used in moderation for rinsing and removing baking soda residue. Avoid excessive use on natural stone surfaces near the oven.
Can I use these recipes on oven racks?
Yes. Most of these pastes work well on removable oven racks. Let the paste sit for several hours, then scrub and rinse thoroughly.
How often should I clean my oven?
A light cleaning every 2–3 months is sufficient for most households. If you cook frequently or experience spills, clean it more often.
Are homemade oven cleaning pastes effective?
Yes. Baking soda-based pastes are effective for removing grease, food residue, and odors when given enough time to work. Very heavy carbonized buildup may require repeated applications or a commercial cleaner approved for your oven model.
Why DIY Oven Cleaning Paste Works: The Science Behind It
Before diving into the recipes, it helps to understand why these simple ingredients are so effective at cutting through oven grime.
The Power of Baking Soda
Baking soda (sodium bicarbonate) is the star ingredient in almost all DIY oven cleaning pastes. Its effectiveness comes from two key properties:
Alkalinity: Baking soda is alkaline, while oven grease and most food particles are acidic. When baking soda comes into contact with grease, it neutralizes the acid, breaking down the grease molecules and making them much easier to wipe away. This chemical reaction does the heavy lifting for you, reducing the need for intense scrubbing.
Mild Abrasiveness: Baking soda particles have a gentle abrasive quality that helps lift dried, stuck-on foods without scratching the oven’s surfaces. This makes it safe for use on metal, glass oven doors, and enamel surfaces.
The Role of Additional Ingredients
Vinegar or Lemon Juice: When combined with baking soda, these acids create a fizzing reaction that produces carbon dioxide gas. This bubbling action helps physically lift dirt and grime from surfaces. The acid also helps cut through grease on its own.
Dish Soap or Castile Soap: These contain surfactants—compounds that are both hydrophilic (water-attracting) and hydrophobic (oil-attracting). Surfactants attach to grease molecules, allowing oil and water to mix and form an emulsion that can be easily rinsed away.
Essential Oils: While optional, citrus essential oils like lemon, orange, or grapefruit add natural grease-cutting power and leave a fresh, clean scent.
How Often Should You Clean Your Oven?
The frequency of oven cleaning depends on how often you cook. Spills and overflows should be cleaned as soon as they happen. For frequently used ovens, a thorough cleaning is recommended at least seasonally—or sooner if you notice any of these signs:
-
Smoke when the oven is turned on
-
The bottom of the oven is covered with crusty food or burned residue
-
A burning or greasy odor when the oven is turned on
-
The door is splattered with grease or baked-on grime
Essential Equipment and Materials
Before you start mixing your paste, gather these items:
Equipment
-
Protective gloves (rubber or nitrile)
-
Safety glasses or protective eyewear
-
Small mixing bowl
-
Sponge or microfiber cloths
-
Old paintbrush (optional, for applying paste)
-
Spray bottle (for vinegar)
-
Plastic scraper or spatula
-
Large sink, bathtub, or plastic garbage bags (for cleaning racks)
Materials
-
Baking soda
-
Distilled white vinegar
-
Dishwashing liquid with degreaser (like Dawn)
-
Liquid castile soap (optional)
-
Lemon juice (optional)
-
Essential oils (optional)
-
Water
Recipe 1: The Classic Baking Soda Paste (2 Ingredients)
This is the most basic and widely used DIY oven cleaning paste. With just baking soda and water, it’s gentle, non-toxic, and surprisingly effective.
Ingredients
-
½ to 1 cup baking soda (depending on oven size)
-
Water (enough to make a spreadable paste)
Instructions
-
Mix the paste: Pour baking soda into a bowl. Add water a little at a time, stirring constantly until you achieve a spreadable paste. The ideal consistency is similar to thin toothpaste or pancake batter. A good rule of thumb is a 3-to-1 ratio of baking soda to water.
-
Adjust consistency: If the mixture looks like a pile of snow, you haven’t added enough water. If it looks like it’s about to dissolve completely, you’ve added too much. Add and stir gradually until you get it right.
-
Apply the paste: Remove oven racks and any other items from the oven. Using a sponge or old paintbrush, spread the paste generously over all interior surfaces—the floor, walls, and inside of the glass door. Important: Avoid applying paste to electrical heating elements and gas vents.
-
Let it sit: Close the oven door and allow the paste to work for at least 1 hour. For best results, leave it overnight or for at least 12 hours. The longer it sits, the more effectively it breaks down stubborn grime.
-
Wipe clean: Using a damp cloth or sponge, wipe away the paste. You may notice the paste has turned brownish—this is the grease and grime being drawn out.
-
Optional vinegar spray: For extra cleaning power, spray white vinegar over the paste before wiping. The vinegar will react with the baking soda, creating a foaming action that helps lift stubborn stains.
-
Final wipe: Wipe the oven with a dry microfiber cloth. Replace the oven racks.
Best For
-
Light to moderate oven grime
-
Regular maintenance cleaning
-
Those who want the simplest, most natural option
Recipe 2: Baking Soda + Dish Soap Paste (3 Ingredients)
Adding dish soap creates a more powerful grease-cutting paste that’s particularly effective on stubborn, baked-on messes.
Ingredients
-
1 cup baking soda
-
½ cup washing-up liquid (dish soap)
-
Splash of water (to achieve paste consistency)
Instructions
-
Combine ingredients: In a bowl, mix the baking soda and dish soap together.
-
Add water gradually: Add a small splash of water and stir until you have a smooth, workable paste. The consistency should be thick but spreadable.
-
Apply the paste: Remove oven racks. Using a sponge, apply a thin, even layer of paste to all interior surfaces, avoiding heating elements.
-
Let it soak: Allow the paste to sit and break down stains, spills, and food splatters. For light cleaning, 15–20 minutes may suffice. For heavy buildup, leave it overnight.
-
Remove the paste: Use a scraper tool to lift the paste and stubborn remnants. Clean off any excess paste with water.
-
Buff the oven: For the glass door, buff with a microfiber cloth for a streak-free shine.
-
Persistent stains: If stubborn marks remain, spray white vinegar onto the stains and wipe away with a cloth.
Best For
-
Heavy grease buildup
-
Ovens that haven’t been cleaned in a long time
-
Stubborn, baked-on food particles
Recipe 3: Baking Soda + Castile Soap + Lemon Juice (Advanced Natural Recipe)
This recipe incorporates castile soap and lemon juice for a more sophisticated natural cleaner that’s gentle on your hands and the environment.
Ingredients
-
1 tablespoon liquid castile soap
-
¾ cup baking soda
-
3 tablespoons water
-
2 tablespoons lemon juice or white vinegar
-
20 drops essential oils (optional, citrus oils work great for cleaning)
Instructions
-
Blend essential oils (if using): In a small bowl, add the essential oils to the castile soap and stir to blend.
-
Mix baking soda and lemon juice: In a separate bowl, combine the baking soda and lemon juice. The mixture will bubble up—this is the normal acid-base reaction. Stir until it calms down.
-
Add soap and water: Mix in the castile soap (with essential oils, if using). Slowly add water a little at a time, stirring until the mixture forms a thick paste.
-
Store or use immediately: Transfer the paste to an airtight container for storage. It can last up to a month in a sealed container.
-
Application: Apply the paste generously onto the oven’s interior, focusing on areas with heavy buildup.
-
Wait: Let it sit for at least 15–20 minutes, allowing the natural ingredients to break down grease and grime.
-
Wipe clean: Wipe clean with a damp cloth or sponge.
-
Vinegar boost: For extra cleaning power, spray vinegar over the paste before wiping—it will react with the baking soda to help lift stubborn stains.
Best For
-
Those who prefer all-natural, plant-based ingredients
-
People sensitive to synthetic chemicals
-
Multi-surface cleaning (also works on stovetops, sinks, and countertops)
Recipe 4: Baking Soda + Dish Soap + Vinegar (The Power Combo)
This recipe combines the abrasive power of baking soda, the grease-cutting of dish soap, and the acidic cleaning of vinegar.
Ingredients
-
1½ cups baking soda
-
½ cup dish soap (Dawn or similar grease-cutting brand)
-
¼ cup white vinegar
Instructions
-
Combine dry and liquid: In a bowl, mix the baking soda and dish soap.
-
Add vinegar gradually: Add the vinegar slowly while stirring. The mixture will fizz—this is normal.
-
Mix to paste: Continue stirring until you form a thick paste, similar in consistency to toothpaste.
-
Apply and let sit: Remove oven racks and apply the paste to all interior surfaces. Let it sit for a few hours or overnight.
-
Clean up: Wipe away with a damp cloth. For the racks, soak them in a sink or tub with hot water and vinegar.
Best For
-
Extremely dirty ovens
-
When you need maximum cleaning power
-
Quick results with minimal scrubbing
Recipe 5: Cream of Tartar + Dish Soap Paste (Alternative to Baking Soda)
For those who want a variation or don’t have baking soda on hand, cream of tartar offers similar abrasive properties.
Ingredients
-
1 cup baking soda
-
2 tablespoons cream of tartar
-
1 tablespoon dish soap
-
Water (enough to make a thick paste)
Instructions
-
Mix dry ingredients: Combine the baking soda and cream of tartar in a bowl.
-
Add dish soap and water: Add the dish soap and enough water to create a thick, spreadable paste.
-
Apply, wait, and wipe: Follow the same application process as the other recipes—apply to oven surfaces, let sit, and wipe clean.
Best For
-
When you want to experiment with different abrasives
-
If you have cream of tartar on hand and want to use it up
Recipe 6: Cornstarch + Vinegar Paste (Baking Soda-Free Option)
If you don’t have baking soda or prefer a different approach, cornstarch and vinegar can create an effective cleaning paste.
Ingredients
-
Cornstarch
-
White vinegar (enough to form a paste)
Instructions
-
Mix: Combine cornstarch and vinegar to form a paste. The mixture undergoes a physical reaction called acid hydrolysis.
-
Apply and let sit: Spread the paste on oven surfaces and allow it to work.
-
Wipe clean: Remove with a damp cloth.
Best For
-
When you’re out of baking soda
-
Those who prefer alternative natural cleaners
Step-by-Step Complete Oven Cleaning Guide
Now that you’ve chosen your recipe, here’s the complete step-by-step process for cleaning your entire oven.
Step 1: Prepare the Oven
Empty the oven: Remove all oven racks, in-oven thermometers, and oven liners. Set them aside for separate cleaning.
Protect the floor: Place newspapers or a drop cloth on the floor beneath the oven to catch any drips.
Wear protective gear: Put on rubber gloves and safety glasses. Cleaning an oven requires reaching into a small, enclosed space, and protective gear prevents injury from splatters.
Step 2: Steam the Oven (Optional but Recommended)
Using steam before applying your paste can significantly soften stuck-on grime and make the cleaning process easier.
-
Place an oven-safe bowl or baking dish filled with water in the oven.
-
Set the oven temperature to 450°F (230°C) and set a timer for 30–60 minutes. The heavier the grime, the longer the container should remain in the oven.
-
Turn off the oven and leave the door closed until the oven has cooled completely.
-
The grime will be softened and ready for cleaning.
Step 3: Mix Your Cleaning Paste
Choose one of the recipes above and mix your paste in a small bowl. Remember:
-
The consistency should be spreadable—similar to toothpaste or pancake batter
-
You can adjust the amount of water or liquid ingredients to achieve the right texture
-
Double the recipe if you have a large oven
Step 4: Apply the Paste
Using a sponge or a clean paintbrush, spread the paste on:
-
The walls of the oven
-
The floor (bottom) of the oven
-
The interior side of the glass door
Important precautions:
-
Do not put paste on electrical heating elements
-
Avoid gas vents
-
The method is safe for both metal and glass oven doors
Step 5: Let the Paste Work
Close the oven door and allow the paste to work:
-
Minimum: 1 hour
-
Recommended: Overnight (at least 12 hours)
-
Heavy grime: 12–24 hours
During this time, the alkaline baking soda will neutralize and break down the acidic grease. If you used vinegar or lemon juice, the fizzing reaction will help lift dirt from surfaces.
Step 6: Clean the Oven Racks (While the Paste Works)
While the baking soda is working in the oven, use this time to clean the oven racks.
Method 1: Soak in the sink or bathtub
-
Place the racks in an empty sink, bathtub, or heavy-duty plastic garbage bags.
-
Spray them with distilled white vinegar.
-
Sprinkle with baking soda. The mixture will foam.
-
When the foaming stops, add hot water until the racks are fully submerged.
-
Allow them to soak for at least one hour or overnight.
-
Scrub with a sponge or brush and rinse thoroughly.
Method 2: Baking soda paste on racks
You can also apply the same baking soda paste directly to the racks, let it sit, and scrub clean.
Step 7: Remove the Paste from the Oven
After the paste has had time to work:
-
Using a damp cloth or sponge, wipe away the paste. You’ll notice the paste has turned brownish as it draws out the grease and burnt-on food.
-
For stubborn areas, use a plastic scraper to gently lift the paste and grime.
-
Vinegar spray: Spray white vinegar over any remaining residue. The vinegar will react with the baking soda, gently foaming and helping to lift stubborn stains.
-
Wipe again with a damp cloth until all baking soda residue has been removed.
-
Finally, wipe the entire oven with a dry microfiber cloth.
Step 8: Replace the Racks
Once the oven interior is completely clean and dry, replace the clean oven racks.
Pro Tips for Best Results
Tip 1: Preheat with Steam
Always use the steaming method before applying your paste. The steam softens grime and makes the paste more effective.
Tip 2: Apply a Thick Layer
Don’t be shy with the paste. Apply a thick, even layer—especially on areas with heavy buildup.
Tip 3: Be Patient
The longer you let the paste sit, the less scrubbing you’ll need to do. For heavily soiled ovens, leaving the paste on for 12–24 hours is the magic step that does all the work for you.
Tip 4: Use the Right Tools
-
A plastic scraper is gentler on oven surfaces than metal tools
-
Microfiber cloths are ideal for final buffing
-
An old paintbrush makes application easier and more precise
Tip 5: Don’t Forget the Door
The glass oven door often has the most visible grime. Apply paste generously and let it sit. For streak-free results, buff with a clean, dry microfiber cloth after cleaning.
Tip 6: Vinegar is Your Friend
Keep a spray bottle of white vinegar handy. Spraying it over the baking soda paste before wiping creates a foaming action that lifts stubborn stains.
Safety Considerations
General Safety
-
Always wear protective gloves when handling cleaning pastes, especially if you have sensitive skin
-
Wear safety glasses to protect your eyes from splatters
-
Ensure adequate ventilation in your kitchen while cleaning
-
Keep cleaning products out of reach of children and pets
Oven Safety
-
Never apply paste to heating elements or gas vents
-
Ensure the oven is completely cool before starting the cleaning process
-
Rinse thoroughly to remove all baking soda residue before using the oven again
-
If you have a self-cleaning oven, these pastes are safe to use, but still avoid heating elements
Ingredient Safety
-
Baking soda is generally safe for children and pets in small amounts (such as in a cleaner), but can be dangerous if consumed in large quantities
-
Essential oils should be used with caution around children and pregnant women—do your research before using
-
If you have allergies or sensitivities, test a small area first
Storage and Shelf Life
Most DIY oven cleaning pastes can be stored for future use:
-
Storage: Transfer the paste to an airtight container (a mason jar works well)
-
Shelf life: The paste can last up to a month when stored properly
-
Reviving dried paste: If the paste dries out, add a small amount of water to restore the consistency
Troubleshooting Common Issues
Problem: Paste is too runny
Solution: Add more baking soda a little at a time until you reach the desired consistency.
Problem: Paste is too thick and won’t spread
Solution: Add water or liquid ingredients (vinegar, lemon juice) a few drops at a time until spreadable.
Problem: Stubborn stains won’t come off
Solution: Apply a fresh layer of paste and let it sit for a longer period (24 hours). For extremely stubborn spots, use a plastic scraper gently.
Problem: White residue remains after cleaning
Solution: Spray white vinegar over the residue—the acid will react with the baking soda and help dissolve it. Wipe with a damp cloth and repeat if necessary.
Problem: Oven smells like vinegar after cleaning
Solution: Wipe the oven with a damp cloth and allow it to air out with the door open. The smell will dissipate quickly.
Comparison of DIY Recipes
| Recipe | Ingredients | Best For | Time Needed |
|---|---|---|---|
| Classic Baking Soda | Baking soda, water | Light to moderate grime | 1–12 hours |
| Baking Soda + Dish Soap | Baking soda, dish soap, water | Heavy grease buildup | 15 min–overnight |
| Castile Soap + Lemon | Baking soda, castile soap, lemon juice, water | All-natural cleaning | 15–20 min |
| Power Combo | Baking soda, dish soap, vinegar | Extremely dirty ovens | Overnight |
| Cream of Tartar | Baking soda, cream of tartar, dish soap | Alternative abrasive | 1–12 hours |
| Cornstarch + Vinegar | Cornstarch, vinegar | Baking soda-free option | 1–12 hours |
Frequently Asked Questions
Can I use these pastes on a self-cleaning oven?
Yes! These pastes are gentle and safe to use on most ovens, including self-cleaning ones. However, always avoid applying paste to heating elements.
Are these pastes safe for stainless steel or glass oven doors?
Yes! These pastes work well on stainless steel and glass surfaces. Just be sure to wipe thoroughly to avoid streaks.
Can I use these pastes on my stovetop?
Absolutely! These pastes are effective for stovetops as well as kitchen surfaces like sinks and countertops.
How long should I leave the paste on?
For light cleaning, 1 hour is sufficient. For heavy buildup, leave it overnight or for at least 12 hours. The longer it sits, the more effective it is.
Is vinegar necessary?
No, vinegar is optional but highly recommended. It boosts cleaning power and helps remove residue.
Can I use lemon juice instead of vinegar?
Yes! Lemon juice provides similar acidity and cleaning power. It also leaves a fresh citrus scent.
What if I don’t have castile soap?
You can use regular dish soap or mild natural soap instead.
Will these pastes scratch my oven?
No. Baking soda is a mild abrasive that is safe for oven surfaces. It’s gentle enough to remove stuck-on foods without scratching.
My paste turned brown—is that normal?
Yes! The paste turning brownish is a sign that it’s working—it’s drawing out the grease and burnt-on food.
Can I add essential oils to any recipe?
Yes, essential oils are optional additions to any recipe. Citrus oils (lemon, orange, grapefruit) work particularly well for cleaning.
Conclusion
DIY oven cleaning pastes offer a safe, effective, and budget-friendly alternative to harsh commercial cleaners. With just a few simple ingredients you likely already have in your kitchen—baking soda, vinegar, dish soap, and water—you can create powerful cleaning pastes that cut through even the toughest oven grime.
The key to success is patience. Letting the paste sit overnight allows the natural chemical reactions to do the hard work for you, minimizing scrubbing and maximizing results. Whether you choose the classic two-ingredient baking soda paste or a more advanced recipe with castile soap and essential oils, you’ll achieve a sparkling clean oven without exposing yourself or your family to toxic fumes.
Remember: regular maintenance cleaning is easier than tackling months of buildup. By cleaning your oven seasonally—or whenever you notice smoke, odors, or visible grime—you’ll keep your oven looking and performing its best for years to come.
So next time your oven needs attention, skip the commercial cleaners and reach for the baking soda. Your oven, your wallet, and your lungs will thank you.